
Choosing Paint Finishes
July 3, 2025
When I do a color consult, I am often asked this question. What type of finish should I paint the walls and trim? Here is a guide that will help you.
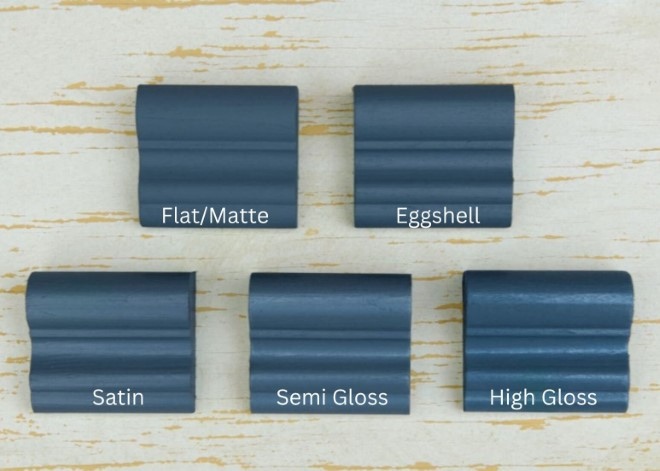
- Flat—This material is great at hiding flaws. It dries completely flat. It is not washable. It doesn’t reflect light. It is often used on the ceiling.
- Matte—This finish has just a hint of sheen for a durable finish. It gives the appearance of flat but is washable. It’s great for walls.
- Eggshell – A very sublet, soft finish. It has some sheen to it. Great for walls.
- Satin – A velvety finish with a smooth sheen. Good for walls. Good in high-traffic areas, like kitchens and bathrooms.
- Semi-Gloss – A lustrous, beautiful sheen for extra durability. Great for doors and trim work.
- Gloss – Brilliant, striking finish for maximum durability. Great for doors and trim.
Note: The higher the sheen in a paint, the more flaws you will see. Today’s trend is using matte on the walls.