
DIY Wood Screen
Do you have a utility box that you would love to hide? Sometimes these boxes are in areas that we wish we could move them, but that would be impossible. So why not hide them instead?
I came across this blog by Remodelaholic, and I love this idea and thought I would share it with you.
Check it out!
Blog by Remodelaholic
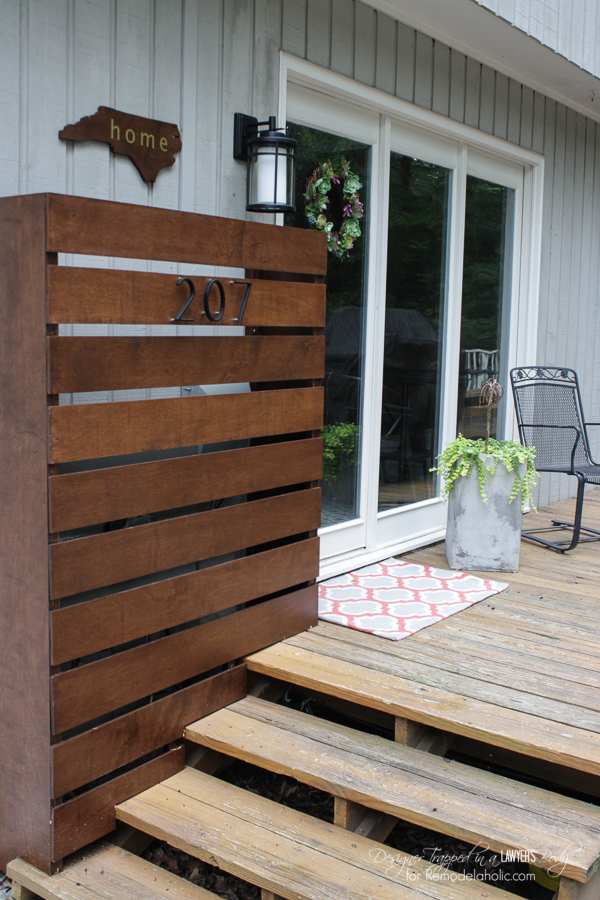
My blog focuses on thrifty DIY projects, easy crafts, and happy household tips. And sometimes, I tackle a DIY project because I have no other choice. The project I am sharing with you today is one of those projects. Our home had these unsightly utility boxes and wires at our back door entry, which is the entry we use the most! Unfortunately, there is no good solution to hide them that we could find, so we came up with our own, and we love how it turned out.
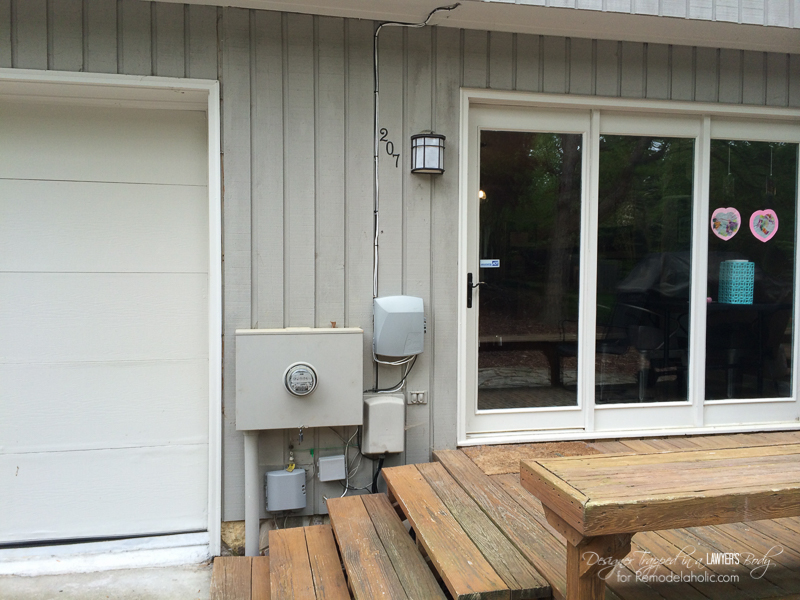
Our quest to hide the utility boxes was the first of many steps we took to improve the back entry to our house. Our rear door entry could not have been less inviting when we started. Don’t believe me? Just take a look for yourself. This is what we started with.
This project of intermediate difficulty requires you to have some basic knowledge of woodworking terms and cuts. But if you have some basic DIY projects under your belt already, I am confident you can tackle this one.
Please check with your local utility company
Materials We Used:
- Plywood {amount varies by project size}
- 2 x 2s {amount varies by project size}
- Wood stain
- Weatherproof polyurethane
- Painter’s tape
- Wood putty
Tools We Used:
- Brad nailer
- Table saw
- Band saw
- Circular saw
Steps:
First, look at the diagrams below, which will provide an excellent visual context for the steps outlined below.
1) Spend some time measuring out and planning your project. For example, we determined how tall and wide we wanted our screen to be and then figured out what cuts we needed to make. Pre-planning will save you time in the end, I promise.
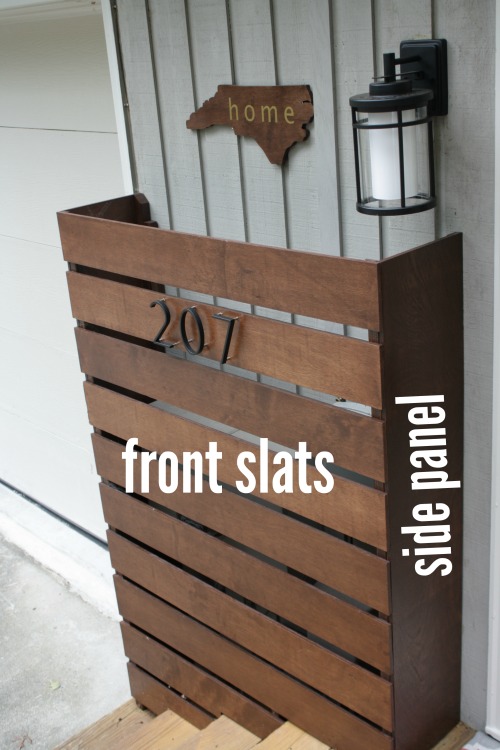
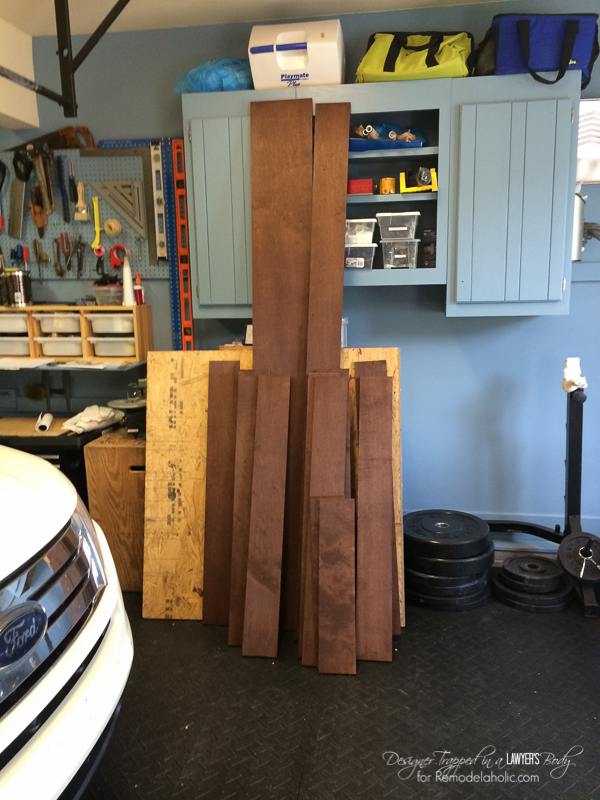
2) Once you determine how tall and wide your screen will be, cut horizontal slats out of plywood for the front of your screen. Remember that you will want to make your front slats long enough to cover the edges of the side panels. We also had stairs to deal with, so we had to consider them when making our cuts for the bottom of the screen.

4) Cut your side panels from plywood to the appropriate size.
5) Once your wood is cut, stain it and add a weatherproof polyurethane. I’m not going to lie; this step is time-consuming. Just listen to some good music or an audiobook for this step.
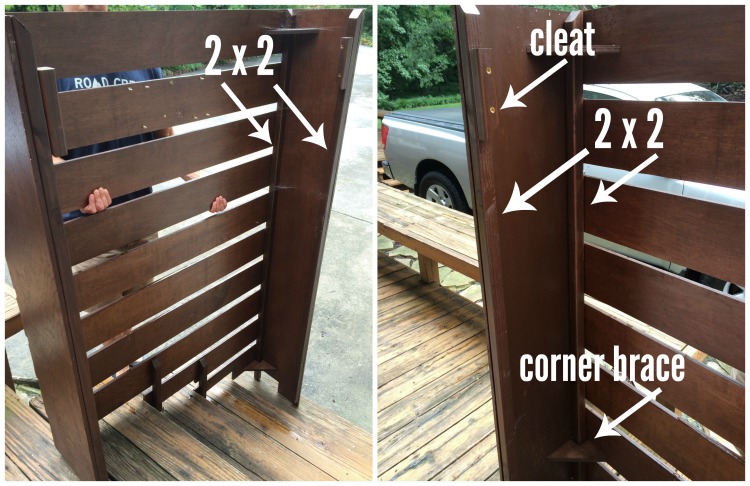
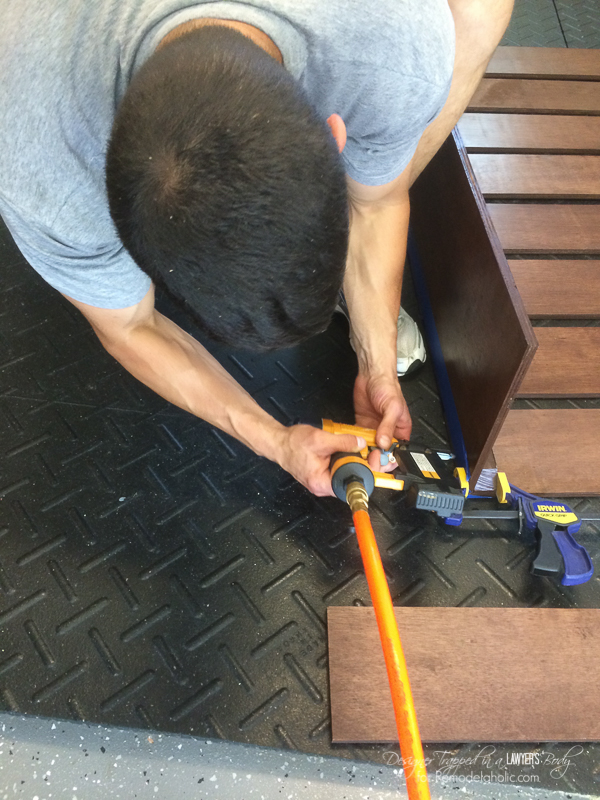
6) Once your poly top coat has dried, you are ready to assemble. Begin by attaching the front slats to two vertical 2 x 2s with a brad nailer. Be sure to leave some overhang so that your front slats will cover the edges of your side panels. We used a scrap piece of wood the same thickness as our side panels to ensure our spacing was correct as we attached the front slats.
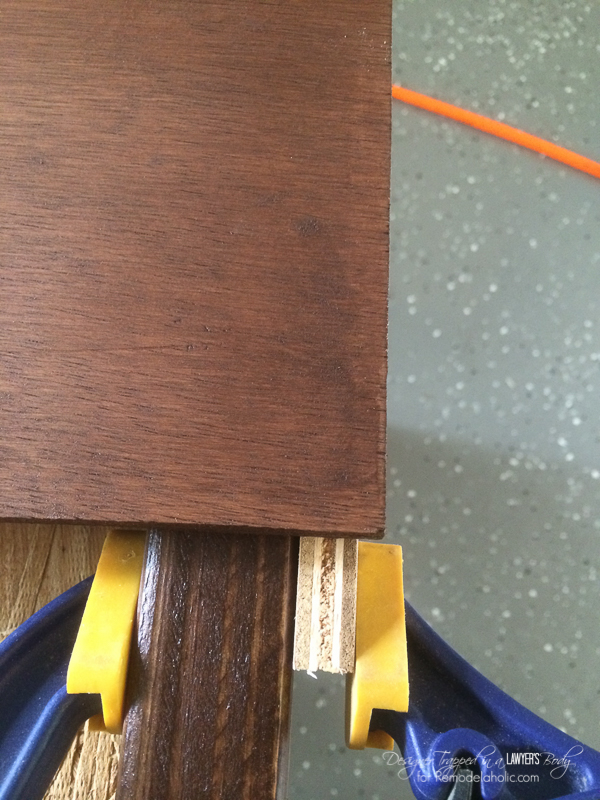
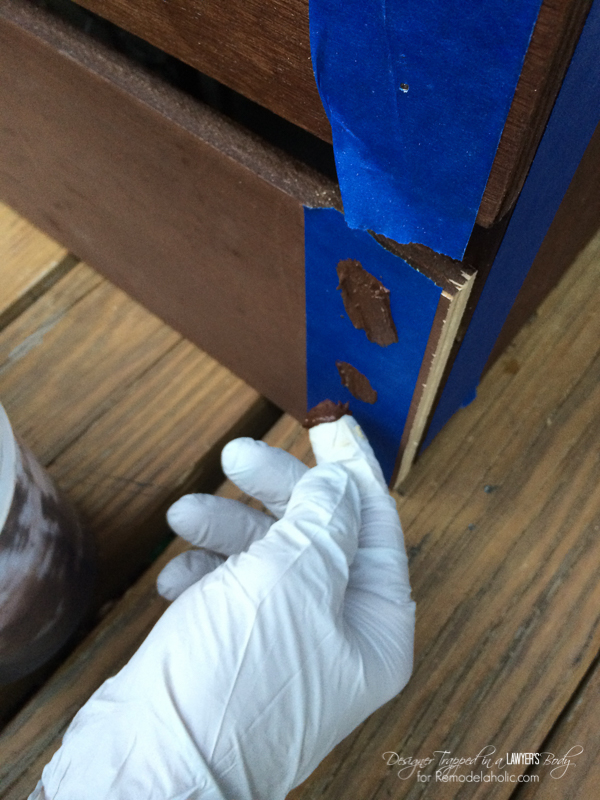
7) Next, attach the side panels with your brad nailer. Note that we taped the edges of our wood with painter’s tape before nailing them. You’ll see why in step 12 ?
8) Attach a 2 x 2 to the back, vertical edge of each side panel.
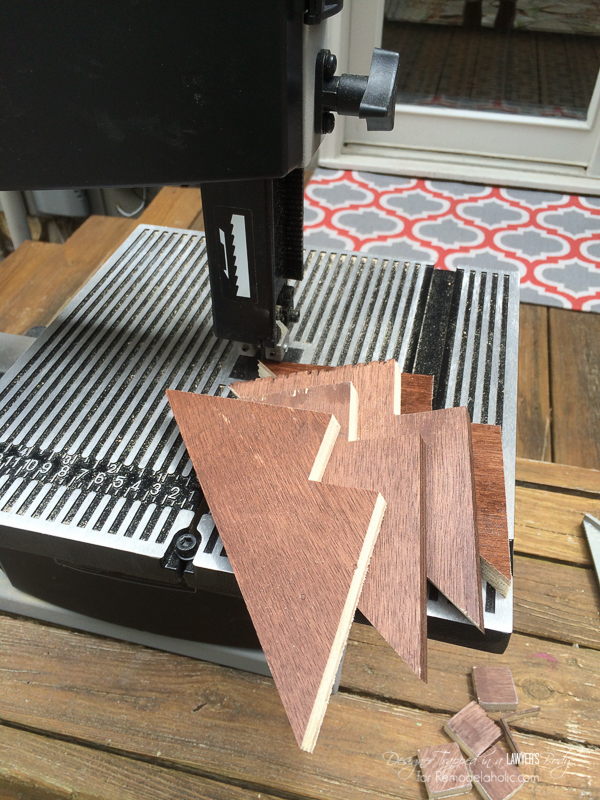
9) Finally, if your screen is as wide or broader as ours, you may need to cut four corner braces to add strength and stability to your screen. We cut ours out of the same plywood using our band saw, but you could also use a jig or circular saw. We attached two corner braces to the top corners of the screen and two to the bottom corners
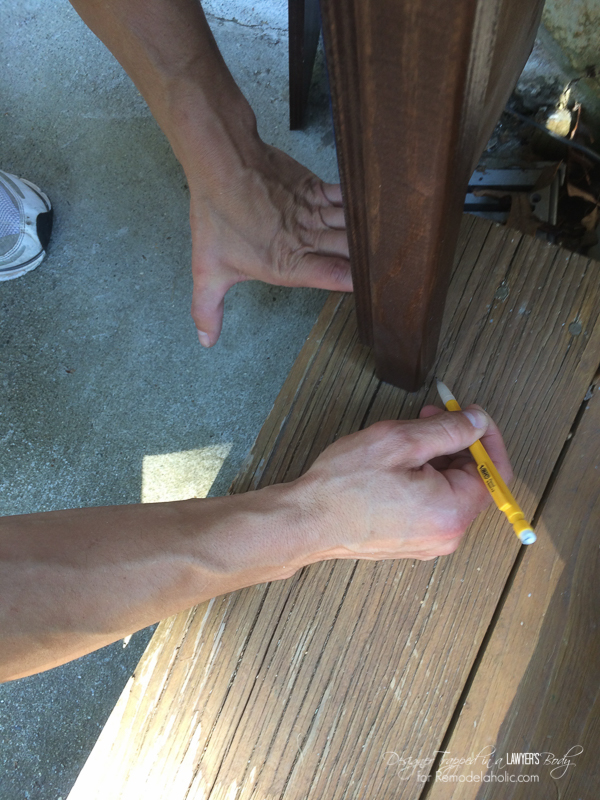
10) Because stairs interfered with our screen, we had to make our 2 x 2s long enough to anchor into the wood stairs. So, we had to cut out a square the same size as our 2 x 2s so that the supports of the screen could be placed through them to make it sturdy. We did this by tracing the 2 x 2 shape on the top and bottom stairs. We then drilled a small hole with a drill bit and a larger hole with a paddle bit. We then squared it off by using a hand chisel. If you are lucky enough to have a flat surface at the bottom of your screen, you should not have to worry about this step.
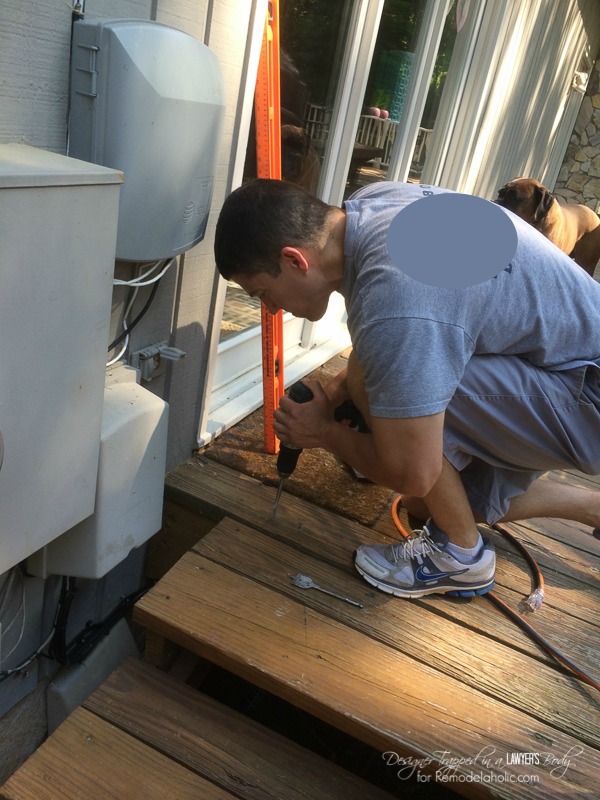
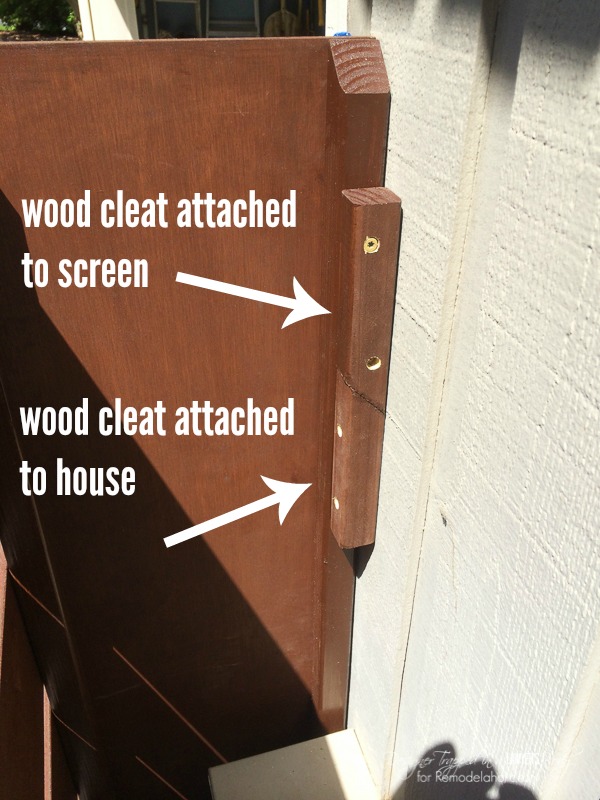
11) Use 2 x 2s to make a wood cleat for each side of the back of the screen to anchor it to your house. This will enable you to easily remove it by lifting it off if you ever need to access the utility boxes, but it will prevent the screen from shifting during strong winds or storms. We have not heard any complaints from our electric company about the ability to read our meter, so they must either remove the screen themselves or peek through the slats! But again, if we need to remove it, it’s super easy to lift it out of the way! If you are concerned about this, you could always hinge the front slatted panel to give you even easier access.
12) Mix a bit of your wood stain with wood putty and fill in the holes left by the brad nails. Then peel the tape off, and you have perfectly matched and patched holes without making a mess! See how that painter’s tape trick comes in handy?
We added some address numbers to ours to dress it up a bit. But we love the finished result. SUCH an improvement from where we started. What do you think?
You can see why I wanted to share this post. The results are excellent. Job well done!!